Photobucket Photobucket Photobucket

Sunday, October 2, 2011

Monsters That Say Boo!


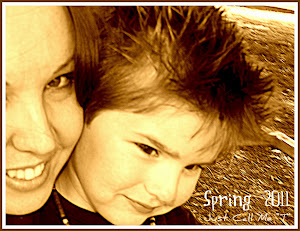
me and my littlest of men :)
I am so glad it's fall now... and I was sooooo hoping school would slow down but no, I have a dozen projects, BIG PROJECTS, all due within the month. SHOOT.ME.NOW


just some flowers lil man and I spotted on our way home
So yeah, I was so happy when we decided to go check out our little town's fall festival {aka Funtober Fest}. Lil man was got himself a few balloons and goodies, got to pain a pumpkin, and then got to march in the children's costume parade. He had a blast! And while I was still on meds from Friday's oral surgery, I managed to enjoy myself and not drool down my chin.
{hehe}


very colorful and very very wet, lol 
I was also excited that I was able to sit down for a bit and work on patching lil man's ripped jeans. Now I don't know about you but if they still fit and can be saved, I'd rather figure out how to than spend the $$ on more jeans. On labor day {while we were on our way to a ball game} I was online and I spotted this cute tutorial on MONSTER MENDING

So that is what I did! 


rockin the jeans
Lil man loves his remixed monster jeans and yeah... RAWR -n- stuff!


my watercolor painting 'Leaves of Fall' and my drawing version (which I did first)
Then today I had to work on a few school projects. I worked on the 2nd & 3rd part of my book mobile for my Children's Lit class {Where The Wild Things Are}... and then on my first real project/ assignment for my watercolor class.


free to make... not bad for my first one
After that I took lil man out to play and began working on a simple project, a SIGN to hang up for HALLOWEEN. I used cardboard from a box, black fabric scraps, orange t-shirt scraps, spider rings, and hot glue. I still think it needs more or SOMETHING, but its cute enough for now and it cost me nothing to make! 


He is not really a clone trooper... so he says.
He is really Luke disguised as a clone trooper...
and yet with all of that he has time to stop and smell the roses. ;)


Party:

Saturday, September 10, 2011

Baseball, Rainy Days, and a Rosette Necklace named Rose


This first month of school has been BUSY! Not only getting used to the little guy in kindergarten {with all that comes along with that}, but also with my classes and assignments. This semester I have to get in 50 hours of pre-teacher work/hands-on observation with the 4th grade teacher I am assigned to {just had my first day yesterday}! I am so excited that I have gotten to read {FOR FUN} in my Children's Literature class, work with a 3rd grade book buddy, make a mobile {I have drafted one for Where the Wild Things Are},  put together a Book Box {I'm thinking Twilight}, and so many more fun projects that will make the harder work fly by!

We did take off for LABOR DAY {schools were closed, of course} and head to Lexington to see an MiLB game {Lexington Legends}. Sadly we didn't stay long b/c of the cold and rain {but we got some cute pics and had fun while we were there!}


He was so excited {and yes, he had his first stadium hotdog!}.


I have no idea who Mercer is... Probably some MiLB player- haha!


I love the wall mural!


He decided he wanted to pitch!


After that we headed to the mall {because who doesn't like that mall?!}.

**********************

I wanted to share a necklace I made and am proud of! I stumbled on these in Charming Charlies {MY LOVE OF A STORE}... Anyways, I went home and looked them up  and thought to myself I can make this {or at least try}...

So I started with the rosettes made with a PINK textured material that had a little stretch to it.


I little folding, twisting, hot glue {and burns} later I had 5 different sized rosettes {3 different sizes, really}. Then I glued them together, onto a chain, and a backing made of the same material... and there she is! i will call her ROSE, and she will be mine!


I cannot wait to make a few more colors of her, especially some more fall tones!

Well I am off to practice my watercolor paintings {auditing a class for fun}. So have a great weekend!


Sunday, August 21, 2011

Fabric Earrings

Well it was a long week, which will wrap up tomorrow with the last day of college registration on campus, followed by my first night class of the semester...  like I said a LONG day! I am so excited that classes are about to begin, but am wondering if I will have the time to craft still?! YES, I must make a way {it feeds my creative escape}.
Anyways... after a long day of cleaning and playing with the little guy I sat down for an hour and came up with 2 cute crafts. One is so simple I will walk you through! 


These cute EARRINGS took me less than 15 minutes to make!

I bought these cute pre-made ROSES and have been wondering what I should make with them when it hit me... earrings! And why not? They are a great size for them. So while I was thinking about {dreading actually} having to find time to head out to Hobby Lobby {which I love but will have no time to go to for at least a couple of weeks} I stumbled upon a few studs not in use... 


So a little trimming of the back of the roses {to make them thinner/flatter}, a little hot glue, and some working of the fingers... I slipped the posts right on through the roses and glued them into place!


I love how WHIMSY the lady bug earrings look... but I also love how SWEET the black ones look!  

Why not try to make your own? I know I will be making more in the future {and looking for something to go behind the back of the roses}

I also made some fabric rosette rings... so come back for that post... soon! 


Party At:


Sunday, August 7, 2011

Black and White

My SUMMER is coming to an end early... this year.  my youngest son starts kindergarten and while usually school begins the end of August, because of the crazy weather last winter he started mid-week / last week.

yes, he has to write out his super long hyphenated first name!
{I'm a mean mom like that, lol}
The first day of Kindergarten is scary. Shoot, the first day of anything is scary. We all have those butterflies, the ones that come when you aren't sure of what the outcome will be. Needless to say, when we picked him up his tears poured down. "Mommy, it is so scary and soooo long"... and mommy just hugged and kissed on him. "Tomorrow will be better sweetie", and it was! I am so happy to say that he is enjoying himself, though he is still missing mommy and still thinks it is too long. ;)

He was already tearing and when he saw us...
a big smile, then the tears, tears, and more tears :(
 Well while he was getting ready for his new venture, I decided to step out and have my hair cut and then highlighted {hl for the 1st time}... and I LOVE IT! Thanks to an awesome fellow classmate/ teacher in training... and her amazing skills! 


And with a little editing magic... 


Ok, onto something yummy! 

GRILLED PIZZA... 
Have you ever had or made this? OH.MY.GOODNESS. it is awesome! My friend Nicki introduced my taste buds to this a few weeks ago... So when we were deciding what to eat yesterday for our get together--- I volunteered her to teach me {and being the good friend that she is, she did!}.


There is the dough... we added some basil, olive oil, and fresh garlic in it! And then I shaped them {see Mickey Mouse?!} for her to put on the grill ... the gas grill she got for her hubby for Father's Day.


And the toppings... complete with some fresh chives that I GREW!!! {yay me}


And there's my pizza... my GRILLED PIZZA! Yes, I loaded it up {I was so excited, if you couldn't tell}. And yes, IT.WAS.YUMMY.

Now... onto my craftiness of the day!

I bought this black fabric at WM today for $2 and wanted to use some of it to make something with rosettes... 


I went into my bag of goodies and came across a black and white chain and clasp set that I bought on clearance at HL... then some B&W fabric scraps I got from there as well, pearl shine buttons, and some braided b&w ribbon... so I knew I was going to make a necklace {just not the design}.


This is what I came up with. 
And I love it! It is different, and was super fun to make.
Now it just needs some clever name, 
other than Black & White Fab Necklace... 
;)


Party at:


Thursday, July 21, 2011

Brownie Cheesecake Swirl and Slumber Party Fun


My step-daughter was having her first ever sleepover with my friend's cute little princess...

A sweet friend Peggie gave me an idea that she knew I would dive into and tweak to my taste {and boy did I}. So hours before Sam came over I whipped up a brownie cheesecake! What is a BROWNIE CHEESECAKE? Only the sweetest slice of heaven you could have on your taste buds {of course}


How does one make a brownie cheesecake? Well, I'll tell you!


What You Need:
Brownie Recipe {or box mix}
Cheesecake Recipe
Springform Pan
Food Gels / Color


First Things First... The Brownie Recipe

One Bowl Brownies
Ingredients:
4 squares Unsweetened Baking Chocolate
3/4 cup (1 1/2 sticks) Butter

2 cups sugar
3 eggs
1 tsp vanilla
1 cup AP flour

Directions:
Pre-heat oven to 350F
Grease pan
Microwave chocolate and butter in large bowl for 2 minutes or until butter is melted.

 Stir chocolate until it is melted.
Stir sugar into the chocolate mix, until well blended. 
Mix in eggs and vanilla. Stir in flour until well blended.

Pour into pan and bake 30- 35 minutes. 

(If you want a thinner layer of brownie, you may want to pour only half into the spring form pan and decrease the time until it is chewy- do not over cook!)

You can pour left overs into a prepared pan and make a side of brownies. Or if you want a thinner cheesecake brownie, divide into two spring form pans... I just made one massive one. ;)


lil man "walked" his fingers across the cooling brownies, lol
While the brownies are baking, make your cheesecake. Click the link below to see this entire recipe (including my cheesecake filling)!


Now the fun part. Divide your mix into separate bowls- one for ever color you are using. I did one for pink, purple, and white {no coloring needed for the white}.  I then spooned on the colors to the top of the cooked and cooled brownies.  Then I baked as directed. Your cheesecake should have a little jiggle to the middle, but not be runny. Let it cool for about 4 hours, this helps it to finish setting.  Then run a smooth blade along the inside rim of the spring form pan and unlatch.  

You are ready to now serve and enjoy! Be as creative with your colors as you want. Since this was a girl's sleep over I chose their favorite colors. But this crafty mama did hers for the 4th of July


Back to the sleepover... The girls played games, the power flickered out a few times due to a massive storm, and then we decided to make crafts... GIRLIE CRAFTS!

Inspired by a  picture off of Very Jane, we decided to make ROSETTE cuffs and matching headbands!


All we needed was a little hot glue, fabric of our choice, stretchy lace, scissors, and buttons for the centers...

Cut into 2-3" thick strips, the length will vary depending on the size of rosette you want. Then twist and glue. 

Cut the lace 1" longer than wrist and glue to the back of the rosette. 


Glue the center button on.


Same rosette process for the headbands... but one headband wasn't the right color so we wrapped and hot glued a fabric strip around it, attached the FLOWER, then attached the button. 

The girls loved making them and wearing them. Now I need to make me a few for me! :D


Party At:

Sunday, July 17, 2011

BananaRama


Yeah so, today I was on a BANANA kick...

I made banana nut muffins


Just doctored up a Martha White mix bag with fresh 'nanners and coloring {b/c my lil man will not eat a tan muffin- haha}.

Then I made some Platanos Maduros... Cuban style fried sweet plantains. 


You have to let your plantains ripen to a nice black- the darker the more sweet... if not they will be starchy and unsweet like a potato. Slice at an angle, about 1/4 - 1/2 inch each. Heat up canola oil and fry until carmalized- turning over. Set them on a paper towel to absorb the oil. Eat as is- no need for sugar they are sweet enough!

And then I also made banana pudding! :D


Just the basic recipe, you can find on any box- only I used 1 3/4 cup of milk per box - used 2 boxes banana pudding, and then I mixed 8 oz cool whip with it... Layered, topped with crumbs my lil man smashed for me {*STEPHEN SMASH!* said in the Hulk's voice}.

So yeah, I'd say we are on a banana kick today!

Hope you enjoyed your Sunday!


Party With: