Photobucket Photobucket Photobucket
Showing posts with label randomness. Show all posts

Sunday, August 7, 2011

Black and White

My SUMMER is coming to an end early... this year.  my youngest son starts kindergarten and while usually school begins the end of August, because of the crazy weather last winter he started mid-week / last week.

yes, he has to write out his super long hyphenated first name!
{I'm a mean mom like that, lol}
The first day of Kindergarten is scary. Shoot, the first day of anything is scary. We all have those butterflies, the ones that come when you aren't sure of what the outcome will be. Needless to say, when we picked him up his tears poured down. "Mommy, it is so scary and soooo long"... and mommy just hugged and kissed on him. "Tomorrow will be better sweetie", and it was! I am so happy to say that he is enjoying himself, though he is still missing mommy and still thinks it is too long. ;)

He was already tearing and when he saw us...
a big smile, then the tears, tears, and more tears :(
 Well while he was getting ready for his new venture, I decided to step out and have my hair cut and then highlighted {hl for the 1st time}... and I LOVE IT! Thanks to an awesome fellow classmate/ teacher in training... and her amazing skills! 


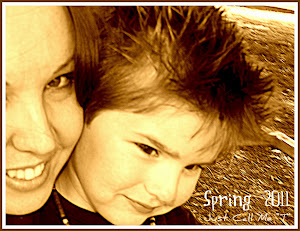
And with a little editing magic... 


Ok, onto something yummy! 

GRILLED PIZZA... 
Have you ever had or made this? OH.MY.GOODNESS. it is awesome! My friend Nicki introduced my taste buds to this a few weeks ago... So when we were deciding what to eat yesterday for our get together--- I volunteered her to teach me {and being the good friend that she is, she did!}.


There is the dough... we added some basil, olive oil, and fresh garlic in it! And then I shaped them {see Mickey Mouse?!} for her to put on the grill ... the gas grill she got for her hubby for Father's Day.


And the toppings... complete with some fresh chives that I GREW!!! {yay me}


And there's my pizza... my GRILLED PIZZA! Yes, I loaded it up {I was so excited, if you couldn't tell}. And yes, IT.WAS.YUMMY.

Now... onto my craftiness of the day!

I bought this black fabric at WM today for $2 and wanted to use some of it to make something with rosettes... 


I went into my bag of goodies and came across a black and white chain and clasp set that I bought on clearance at HL... then some B&W fabric scraps I got from there as well, pearl shine buttons, and some braided b&w ribbon... so I knew I was going to make a necklace {just not the design}.


This is what I came up with. 
And I love it! It is different, and was super fun to make.
Now it just needs some clever name, 
other than Black & White Fab Necklace... 
;)


Party at:


Friday, July 8, 2011

Earrings & Randomness

Just wanted to say HELLO out there... We've been enjoying our summer, hope you have too! 

Right now, I am just sitting here, on campus, at my desk, looking out the window as the rain pours down and cools off our SUMMER heated hills. 


I have no craft to share today... it has been busy and I have missed my me time- BUT kids time is SO much more fun! This past Saturday I had a couple of friends over {one with her daughter and baby niece} for TEA with my step-daughter. We were celebrating my Eli's birthday, and it also happened to be my friend's daughter's birthday... so we had a girlie day while our men and boys joined forces. I did try my hands at making SCONES and they came out pretty good for a first timer... I will have to post the recipe I used later. 


After tea, we went out to see Monte Carlo and let me just say that it is not every day that I see a good, non-corny {yet appropriate/ family OK'd} movie that is not a cartoon. We loved the movie, though the men folk were spared and themselves enjoyed Cars 2. ;) For the 4th we had a great time at the zoo and then watching the new Transformers movie. The kids loved it, even if we ended up watching the fireworks from the car on our 2 1/2 hour ride home. 

Other than that its been cookouts with friends, water play with the kids, and fire fly catching! 

I do want to share the SUPER CUTE earrings I purchased today from Very Jane


Aren't they cute?! Right now they are on SALE for $4, so I could not pass that up! I bought two; the ruby red and the white pairs and cannot wait for them to find their way to ME!


Well. that is me, my life right now...


But wait... I did want to show my hooker toes off! Well, not really, but what is summer without a pedi! 

Oh, and if you haven't already, please find and "like" me on Facebook

Hope you all have a great Friday... and weekend. :)


My friend, my CP Destiny, sent me this today...
I thought I'd share this as I end this blog post.
God Bless!


Friday, June 24, 2011

Hanna Flower Necklace


This is my second necklace using the, easy to make, HANNAH FLOWER. Last time I made them I used them with a simple t-shirt necklace {check it out when you get a moment}... 

I wanted to make something that with white {an old t-shirt} but I didn't want to do another pom-pom necklace just yet {I have other fabric for the next pom-pom necklace I am going to do}.

Anyways... I came up with the following, using some easy steps and added some "bling" to it with some pearls and magnetic beads. Took me about 30 minutes!


I  made the flowers just like I did in my OTHER post { when I made the t-shirt necklace}.
I cut the strips about 3 inches thick. After I cut it is was fully attached, so I cut it to make it into a longer strip.
Then I shortened the lengths depending on the size I was going for
{matching two strips up in pairs, to make 4 plus one larger one "the odd man out"}
After that, I twisted it into one long strand and then I folded the TWISTED fabric in half and twisted again
{not too tight, t-shirt material stretches}
.
Starting that the cut side of the twisted fabric I used the hot glue gun to keep my center in place and wrapped the material around itself, gluing as needed, until I was just out of material and then I glued on that last part with a little underneath.
After all the flowers I wanted were made
{in this case, 5}
I placed them on a piece of white felt
{match your fabric color}
and then when I was happy with it, I glued them in place...
START AT THE MIDDLE and work out but do NOT glue the top outer two flowers yet.
Measure the chain the length you want it, with the flower "bib" and cut. It will just go over your head, so no clasps needed
{but too short and it wont fit}.
Then glue the chain ends on the back, in the middle of the flower and then glue both onto the felt.
Now you want to cut off the extra felt, around your flowers, so that you cannot see it from the front.
After it is cut out, glue any spots that need to be secured
{like where the flowers touch- or it will be too wobbly}.
Using fabric glue
{or the glue gun & glue you just used}
 glue on any beads to the center of your flowers to give it an extra SPARKLE.

And there you have it! 


If you make one, or have something you made using the Hannah flower... please let me know!

~~~~~~~~~~~~~~~~~~~

Before I go, I thought I'd share this cute little teddy bear with a blanket that I drew. Drawing, when I have the time, relaxes me and stretches me in a good way. Inspired by my friend Di {of The Girl Creative}, when she told me she was pregnant... 


Well, have a great Friday and enjoy your weekend! We are off for another weekend adventure- last week St Louis  and went to the Saint Louis Zoo and to go up the Gateway Arch... this weekend Cincinnati to check out {revisit} the Cincy Museum


Party Time:

Sunday, May 29, 2011

Memorial Weekend Cupcakes- Marshmallow Frosting


This weekend was bitter sweet. We said goodbye to a dear FRIEND we had made over the year. She was here working on another Masters degree- from the Ukraine and while we are sad to see her go, we rejoice in knowing that she will soon be home with her family and friends in the Ukraine and thankful to God that we crossed paths. 


Olya, you are a blessing sweetie-
may God continue to move in your life!

Yesterday our town had its "Memory Days Parade"... It was hilarious {and that is all I'm gonna say about that!}. After that we went to the lake with Olya and another friend Sarah, for fishing and just to enjoy the sun that has finally come out {yay}.


So for dinner I made a Peruvian dish, Lomo Saltado, for our family and friends. It was a sort of "farewell dinner"... followed by white cupcakes topped with MARSHMALLOW FROSTING {recipe to follow}. It took all of ten minutes to make the frosting, and that is stretching it...

Don't they look yummy?! 


Marshmallow Frosting

3/4/ cup butter, softened at room temp
2 cups of confectioners' sugar
2 tablespoons of milk
1 teaspoon vanilla extract
1 jar (7 ounces) marshmallow fluff/ creme

Beat butter in a large bowl, until fluffy.
Beat in the confectioners' sugar,  milk, and vanilla extract, until smooth.
Beat in marshmallow fluff until light and fluffy.
*Beat in coloring, if desired.

Spoon into pastry bag with desired tip and top cupcakes, add sprinkles, and let it sit for 15 minutes.

Enjoy!


Well, I am off to WATCH another episode of Band of Brothers, work on my mini GARDEN, and PAINT a canvas for a project I am working on for our lil man... 

Happy Memorial Weekend & God Bless!


Thursday, May 26, 2011

Yet Another Lego Party

Well lil man had his Lego inspired party this past Saturday. I scowerd the internet looking for ideas and came across a few that I just have to share.


First off I purchased Living Locurto's Lego themed printable package. It was a good deal; personalized and I can reuse it for any other parties I throw! 


Then I went to Amazon and ordered a Lego brick ice cube tray LIKE THIS and Lego blocks stackable candies {they tasted like sweet tarts}!

With the ice cube tray, of course I made ice cubes... but I also made chocolate LEGO CANDY BARS and used the napkin holder printable {from the Lego pkg  I mentioned before} and used them to wrap the candies. For the stackable lego candies, I used mini treat bags from Hobby Lobby {best store ever} topped with candy labels I created for party favors.


I also made LEGO MARSHMALLOW POP-HEADS... found HERE. I did  not use regular flavored marshmallows, I used the vanilla/caramel ones. And instead of drawing the faces myself, I set up a table with food markers for the kids to draw there own- then wrap them up to go in their favor bags!
{I had them put together their own favor bags and threw in a minifigure Lego kit}

LEGO WAFER BLOCKS were made with store bought PB chocolate covered wafers. I put drops of frosting on them and then used m&ms to make the Lego tops. Cute, easy, and fun! 


Instead of a cake, I made CUPCAKES using my baker friend's {Becks} recipes. A couple months ago I asked for her to play around with a strawberry cupcake/ cake recipe for me that used real strawberries and that didn't use jello like the ones I kept finding. I would have totally had her make them, but she lives states away so she guided me along. In April I made them for a girl's night out party {as a test run}...


Anyways I made {from scratch} CHOCOLATE, VANILLA, and STRAWBERRY cupcakes. Then I thought I would make my own version of NEAPOLITAN CUPCAKES using the left over batter {and that there was plenty}!

neo cupcake w/ orange icing...
the chocolate ran up through it and man was it yummy!
For the Neo cupcakes I layered them by density... Chocolate on the bottom, then the strawberry, and then the vanilla. THEY WERE SOOOO YUMMY! I topped all the cupcakes with BUTTERCREAM ICING that I also had colored orange & sky blue using Wilton gels. I left some white and then I sprayed some of the white ones yellow {like lego heads} using Wilton's food color spray.|


I purchased a $5 paper cupcake holder by Wilton and decorated it myself {and I am able to reuse it too}. It held 24 cupcakes, and the rest went on a mock Lego box.


I was going to make the PIÑATA but time eluded me, so off the hubbs went to get a festive Mexican made one down the street. :D
The last thing I wanted to share was the LEGO BACKDROP I made for picture taking... I wrapped a TON of different sized boxes. From a huge flat screen box to lil wii remote boxes, I wrapped them up and stacked my blocks. This was fun for the kids to take pics in front of and mess around with.
All in all, we had a great birthday party. Lil man said it was his "bestest" EVER
Happy 5th to our youngest!


Thank you to my friends who helped me decorate & clean up.
And a thank you to all the talent out there offering inspiration for 
LEGO parties!

~~~~~~~~~~~~~~~~~~~~~~~~~~
Side funny pic... this is why I made cupcakes
it was yummy, and we had it at home on his b-day...
but it was NO Lego!
hahaha
~~~~~~~~~~~~~~~~~~~~~~~~~~~~~~~~~~~~


Before I go, I wanted to BRAG on another friend, Sarah. She's a classmate of mine, and a missionary. Anyways, she made this clever card for lil man's birthday {which now sits on my desk at work}.


Thanks for visiting!


(ps, please keep lil man in your prayers as he heals from another surgery... this one is gonna take longer than his tubes last month)


UPDATE: Lil man's surgery went well and he is healing up... though VERY VERY whinny! ;)

~~~~~~~~~~~~~~~~~~~~~~~~~~~~~~~~~~~~~~~~~~~~~

Linked Up:


The Girl Creative - Just Something I Whipped Up
Sumo's Sweet Stuff - Market Yourself Monday

Wednesday, May 4, 2011

Toy Story Party


I am getting ready to celebrate my youngest... my last baby's 5th birthday in a couple of weeks. So while I plan and prep for his big birthday party I thought I'd share some of our past parties.

I decided to start with lil man's fourth birthday. Last year he wanted a TOY STORY party, mainly about Buzz Lightyear.

We were limited on budget {being college students} but I did manage to make a cute rocket ship pinata and some fun games to play!


A friend used my camera and well, while I was thankful I don't really have too many pics to work with... she took too many of her boyfriend and his son. lol :P

Ok, so I did not make the cake... I bought it {requested the packaged decor stay OFF the cake} and I bought a package of Toy Story toys to put on it... it worked!

We just put up a bunch of primary color decorations inside. Outside was for our bounce house {its ours, so its smaller}...

For the centerpieces I put various toys in the middle. First I started with the TS toys we had, but then I went ahead and did a Barbie table for the girls, a dino table, etc...  It was cute and the kids could play at the tables too.


One game we played was pin the tail on Bullseye! :D


 For more wall decor, I bought the reusable wall stickers of TS... they now reside in lil man's room and some even glow in the dark! {win win}


 Another game we played was a potato head match up... kinda like a race.


I used to be part of a mom's group and won a lot of potato heads and other toys... so we had a LOT of taters to play with! lol

And now to our ROCKET PINATA!!!


PINATA PASTE
Materials:
Flour  -1 part
Water - 5 parts
Saucepan
Spoon
Bowl
Stove top
Hand beater
Directions:
I used a cooking recipe for my glue...
4 parts water in saucepan, on the stove and bring to a boil
1 part flour to 1 part warm water , beat till lumps are gone
Once pot is boiling stir mixture into the pot and mix well
Boil for 2-3 minutes
It should be smooth and have a constancy of glue
If needed, add more water or flour in small amounts until you get the constancy you want

ROCKET PINATA
Materials:
Balloons {one rounded, two long shaped}
Poster Board
Painters Tape
Scissors
Newspaper Strips
Crepe paper or Tissue Paper {I used crepe for this one; in red, white, and blue}
Glue Gun & Hot Glue
Print out {I made a window sign}
Ribbons
5-50 cord {or a heavy duty cord/ rope}

Directions:
Ok, first I blew up the balloons...
Then I attached the two long ones end to end- tape helped
Then I blew up a med sized round balloon for the top and taped it with the other balloons
Then I took my strips of newspaper and dipped into the glue, used my fingers to take of extra... and then began wrapping the balloons
{I did this outside on a junk/ craft table so that the sun would aid in drying it and to keep the mess outdoors}
Do this until it is covered, 2-3 layers, drying in between
{remember you WANT the kids to be able to crack it open- haha}
Once hard, pop the balloons and remove them
I then took my poster board and rolled it around my long balloons to get an idea of what to cut off
I cut my poster board {you will use the extra pieces} and wrapped it around my long balloons and taped it into place
Make a cone top and tape on to the top
I then took my crepe paper and snipped the sides to make fringe {a bunch at a time}
Using my glue gun I worked from the bottom up {but not underneath yet}
Then I cut out wings from left over poster board and taped then on
I used more crepe paper to cover up the pinata
After I decorated it with crepe I fluffed it out
Then I stuck the goods in from underneath and taped the bottom back into place and covered it with red crepe and ribbons
I punched two holes through the rocket top to hang {not the cone}
and there you go!

It was fun to make and didn't take long... though it was not my first. :)

Well, I am off to dream of how I will be doing my son's pinata this year and all the other goodies I really want to do up this time around.