


My step-daughter was having her first ever sleepover with my friend's cute little princess...
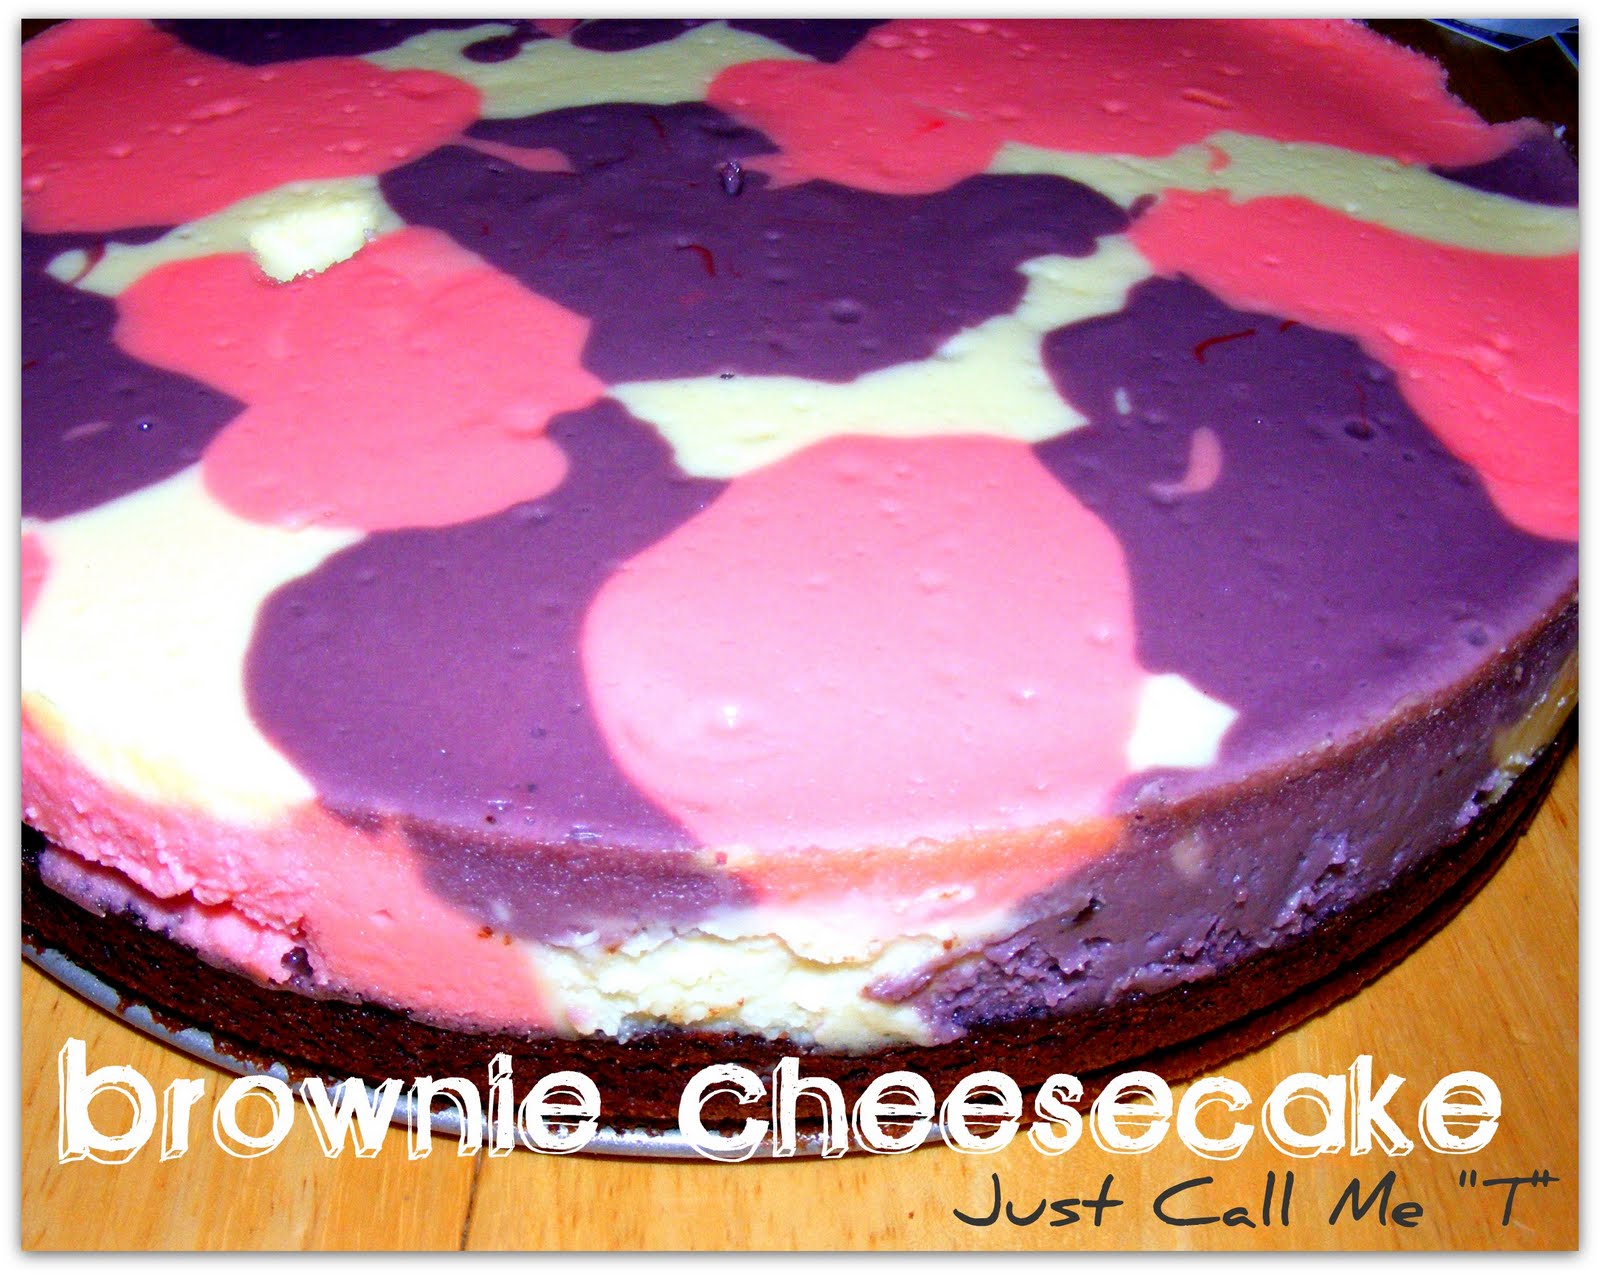
A sweet friend Peggie gave me an idea that she knew I would dive into and tweak to my taste {and boy did I}. So hours before Sam came over I whipped up a brownie cheesecake! What is a BROWNIE CHEESECAKE? Only the sweetest slice of heaven you could have on your taste buds {of course}!
How does one make a brownie cheesecake? Well, I'll tell you!
What You Need:
Brownie Recipe {or box mix}
Cheesecake Recipe
Springform Pan
Food Gels / Color
First Things First... The Brownie Recipe
One Bowl Brownies
Ingredients:
4 squares Unsweetened Baking Chocolate
3/4 cup (1 1/2 sticks) Butter
2 cups sugar
3 eggs
1 tsp vanilla
1 cup AP flour
Directions:
Pre-heat oven to 350F
Grease pan
Microwave chocolate and butter in large bowl for 2 minutes or until butter is melted.
Stir chocolate until it is melted.
Stir sugar into the chocolate mix, until well blended.
Mix in eggs and vanilla. Stir in flour until well blended.
Pour into pan and bake 30- 35 minutes.
(If you want a thinner layer of brownie, you may want to pour only half into the spring form pan and decrease the time until it is chewy- do not over cook!).
You can pour left overs into a prepared pan and make a side of brownies. Or if you want a thinner cheesecake brownie, divide into two spring form pans... I just made one massive one. ;)
 |
| lil man "walked" his fingers across the cooling brownies, lol |
While the brownies are baking, make your cheesecake. Click the link below to see this entire recipe (including my cheesecake filling)!
Now the fun part. Divide your mix into separate bowls- one for ever color you are using. I did one for pink, purple, and white {no coloring needed for the white}. I then spooned on the colors to the top of the cooked and cooled brownies. Then I baked as directed. Your cheesecake should have a little jiggle to the middle, but not be runny. Let it cool for about 4 hours, this helps it to finish setting. Then run a smooth blade along the inside rim of the spring form pan and unlatch.
You are ready to now serve and enjoy! Be as creative with your colors as you want. Since this was a girl's sleep over I chose their favorite colors. But this crafty mama did hers for the 4th of July.

Back to the sleepover... The girls played games, the power flickered out a few times due to a massive storm, and then we decided to make crafts... GIRLIE CRAFTS!
Inspired by a picture off of Very Jane, we decided to make ROSETTE cuffs and matching headbands!
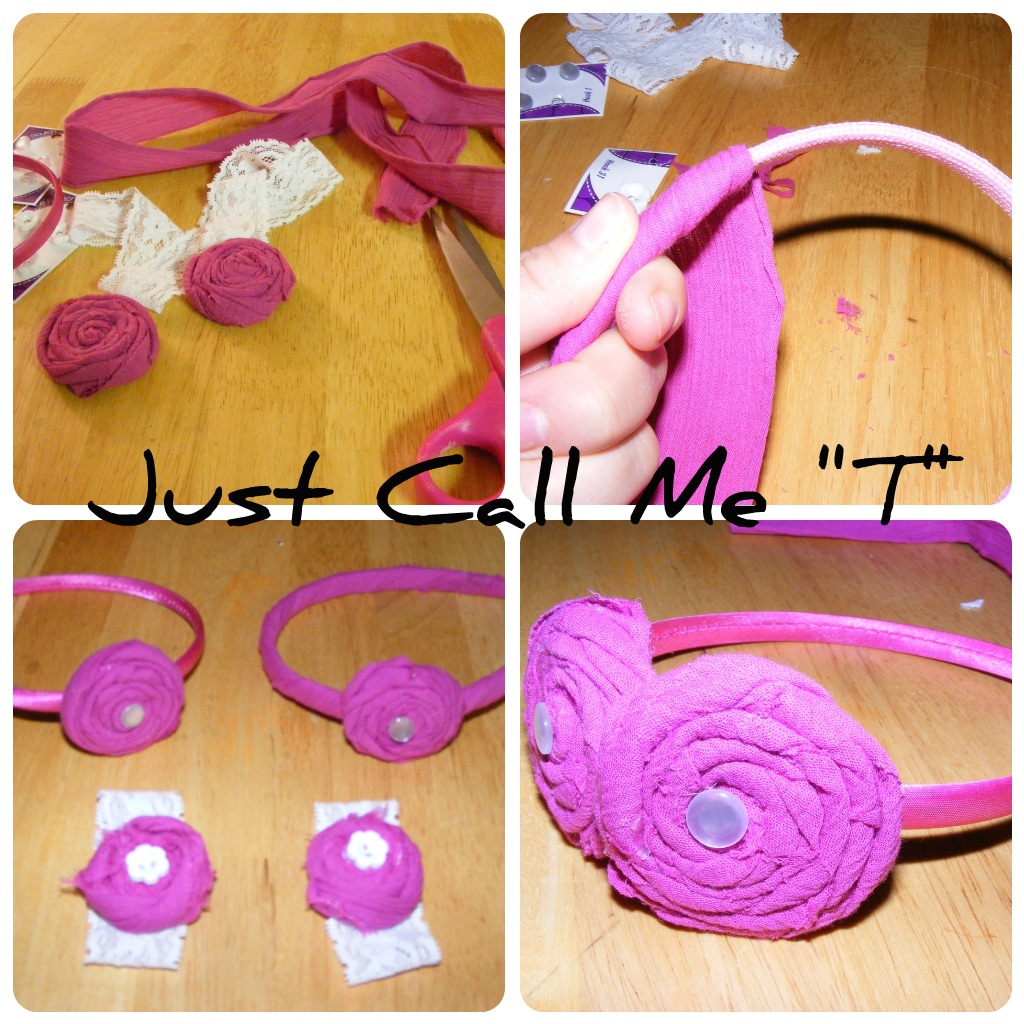
All we needed was a little hot glue, fabric of our choice, stretchy lace, scissors, and buttons for the centers...
Cut into 2-3" thick strips, the length will vary depending on the size of rosette you want. Then twist and glue.
Cut the lace 1" longer than wrist and glue to the back of the rosette.
Glue the center button on.

Same rosette process for the headbands... but one headband wasn't the right color so we wrapped and hot glued a fabric strip around it, attached the FLOWER, then attached the button.
The girls loved making them and wearing them. Now I need to make me a few for me! :D

Party At:


These are some really cute ideas!! I really like them! Thanks for sharing!
ReplyDeleteJacque @ Jacque's Soda Parlor
thesodaparlor.blogspot.com
P.S. I'm your newest follower! Please stop by my blog and visit. I would love to see you there!
Thanks Jacque! I will be by in a few. :)
ReplyDelete