Photobucket Photobucket Photobucket

Wednesday, March 30, 2011

Easter Chick and Bunny

Obviously I had NO idea what to name this blog POST. {lol}

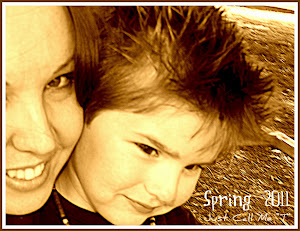
This week we have been SUPER busy; with classes -yes... but mainly with our lil man. So lately lil man has been having a BAD time with his ears... and Monday we went back to the ENT to have him look the lil guy over and are now scheduled for minor SURGERY on Friday {a bilateral myringotomy with PE tube placement... basically ventilation tubes in both ears}. We're PRAYING this will put an end to his chronic ear infections and fluid problems- not to mention the horrible pain he has been in. :/ 

There is lil man... he wanted to work on his own Easter colorings!

Well anyways... As I have said before I am a f/t college student, but I am also a work study for our school's registrar's office and work with the academic office too. I love that I have been asked to keep up with the bulletins. Occasionally I won't do them {lack of time, or someone else had an idea where I did not}. I LOVE doing them and documenting them so that when I have my own classroom I will be able to tweak and reuse my ideas. So this week I started working on one of the two bulletins for Easter. I want to do one all cute-like and one with a Christian message {I have not started on that one yet}.

So here are my little EASTER chick and bunny characters that I plan on putting up. Yes, I do like to add different texture and play around with the boards. These lil guys were so cute to make and while the chick has this fun texture the bunny's fur is super soft {I like to pet the bunny - lol}.


I got the template off of TIP JUNKIE and then enlarged it & tweaked it for what I wanted... 


I love them and want to make 2 more for our HOME!

Now I have some basic bunny and egg shapes to work with for the same bulletin... {Hmmmmmm}


Linked Up...


Thursday, March 24, 2011

Lemon Sunshine & Irish Cream Filled Cupcakes

First off on a side note... This week has been CRAZY, starting LATE Saturday night and running through Sunday morning. My LIL MAN ended up in the hospital again for his ears. Between his doctor, his ENT, and the ER, the last 2 months have been painful for him and exhausting for us. While he has other medical issues these two months have mainly been his ears, so it looks like tubes {we will find out next week}. I just want my lil man to be better again {no more crying out in pain}. It really is {IMO} one of the hardest things a parent can emotionally face- when their child is in pain {little or big} and you can only hold them, pray over them, and give them medicine, to comfort them. Well, it has been a long week and it is coming to an end. Lil man's meds are working, though he hates all of them. So for a treat we have decided to take him out to the movies tomorrow {either Nomeo or Rango, he will choose}
So at least we will end the week on a HAPPY NOTE


Another happy note, well for me baking wise, is that my sweet baker friend and CRAZY PRINCESS sister Becks has hooked me up with two of her yummy recipes for cupcakes I am wanting to make for my lil man's 5th BIRTHDAY {and she is playing around with another for me}. I would TOTALLY have her do the baking, but sadly we live too far away for that. I wanted to do them from scratch {like my frosting} but I wanted something a bit more dense, yet moist and pudding-like. IMO, box mix does NOT do that {even with the pudding mix kind} and I want my cupcakes to hold filling better than the ones I will talk about in a minute. Well, I will be testing them out soon enough as a few friends have decided to join me in having a BAKING night on our college campus for a few ladies! {yay}

Anyways... onto the post title stuff. haha

So I wanted to try out my Wilton filling tip and well, I wanted something yummy to eat and share too. I decided to make a vanilla CAKE {box kind} and play around. 


My first batch was turned into {what I will call} IRISH CREAM CUPCAKES. I didn't have any one me and we live in a dry county {yep, shocked me when I found out they still exist! lol}. So instead of doing a 45 minute run, I decided to use Irish cream CREAMER. I used it in my homemade BUTTERCREAM frosting, instead of the milk. It came out perfect consistency wise though it was very VERY rich with flavor {next time I will use 1/2 the amount and the other half cream}. I liked it, but since I both filled the cupcake with it and topped it with it, it was a tad over kill. {haha} Part of LEARNING. I'd probably liked it filled with CHOCOLATE too.

They do look pretty though! :D

Now this second batch {what I am calling} was made into LEMON SUNSHINE CUPCAKES {lemon filled, CREAM CHEESE FROSTING topped}. I made the frosting a little runnier than usual, because I wanted it to have a poured look to it. It was filled with a lemon filling, topped with the cream cheese frosting, and sprinkled with blue sprinkles {lil man picked them out}. They were SO YUMMY


The one thing I noticed was that they were too light and fluffy for the filling, which is why I called on my friend Becks to help me. Now they didn't crumble, but they could hold the filling better and besides I really want to bake from SCRATCH

Sunshine peeking through the middle!
Well, that is my sharing for the week. I feel a bit off since I didn't CREATE much this week, other than classwork but my baby is getting better and that is what matters most right now. 

Have a BLESSED Friday everyone! 


Sunday, March 20, 2011

Poppin' Some Cake Balls

I stumbled across CAKE BALLS a year ago {yes I know, I was missing out big time} when checking out some baking ideas through my friend The Girl Creative. I then stumbled upon the WONDERFUL world of Bakerella and was amazed. Her yummies looked soooooo good.


Having no real reason to try out the cake balls I just admired them off and on... that is until summer time when my step daughter came to visit. Her mom hadn't thrown her a party yet, since she was going to be with us for her birthday so I threw together a TEA PARTY for her and thought these would be a perfect fit for all the petite little girl hands {and mommy hands}. They went fast!

I have only made CAKE BALLS a couple of times {like I said, I hadn't really had a reason to make them... though now I am coming up with reasons- haha!}.


So for my first try I followed Bakerella's RED VELVET CAKE BALLS though I decided to make my own CREAM CHEESE FROSTING.

HOW YUMMY!


Then a couple of weeks ago {when I was starting up this new bog-o-mine} I ran into Sugar Derby and her FAB St. Patty's inspired GOLD RAINBOW FILLED CAKE BALLS {I just made that name up myself}. I just HAD to try these!


So last week I decided to make these lil babies for SAINT PATRICK'S DAY!


Well I made the "WISE" choice to make them with my all-over-the-place 4 year old son and so I quickly stopped making them rainbow inside and then switched to one pretty color each {so its kinda like I made two different kinds- with lots of pretty colors}.

I wasn't able to get the gold dust so I decided to make some in CHOCOLATE and then some in green colored white chocolate. I liked the milk chocolate better though.


AREN'T THEY CUTE?!


Be sure to check out these great ladies that I mentioned....

Saturday, March 19, 2011

Make-it-Yourself Cream Cheese Frosting


While store bought frosting can be good in a pinch, I prefer to PLAY around in my kitchen. Sure its a bit messier, but its also more fun {especially if you have little mess makers like me}.

So here is my cream cheese frosting recipe. Its quick, easy, and yummy! Its also great for a carrot cake, a light lemon filled cupcake, homemade sticky buns, and well- the reason I made this batch- for CAKE BALLS!

it is soooo yummy and fast to make too!

CREAM CHEESE FROSTING

Ingredients:

  • 1/2 cup of butter (1 stick), room temperature
  • 8 oz of Philly cream cheese (1 pkg), room temperature
  • 2 - 3 cups of powdered sugar
  • 1 teaspoon of vanilla extract

Directions:

  •  With an electric mixer, mix the butter and cream cheese together, about 3 minutes on medium speed until very smooth. Scrape down the sides and bottom of the bowl to ensure even mixing. 
  • Add the vanilla extract and mix. Slowly add the powdered sugar. Keep adding until you get to desired sweetness and thickness.
  •  Either spread on with a blunt knife or spatula, or spoon into a piping bag to decorate your cake or cupcake... or use to mix with your cake crumbs for cake balls.
Side Note: I added just a squeeze of lemon juice for a lemony tang... for my lemon filled cupcakes.

And yes, its SO GOOD you can eat it by the spoon full. ;)


I'm LINKED up with the following {check 'em out}

Recipe Exchange - While He Was Napping

Weekend Wander - While He Was Napping

Thursday, March 17, 2011

Happy St. Patrick's Day!

I came across so many cute and clever ideas on celebrating ST. PATRICK'S DAY and so this year I wanted to BRING IT a bit more {lol}.


you know you wanted to see this... lol

So this morning us "leprechauns" came in, pulled out boots, "peed" green in lil man's potty, left 8 treasure tickets to "hunt" for, had a snack, colored lil man's drink green with "magic", left footprints behind, and left lots of gold bars {chocolate} to find! It was SO much FUN!!


Today we are all wearing our green... Lil man will be all decked out for school {he was the talk of his pre-k class}.


I will be making corned beef and cabbage for dinner... YUM! And I am thinking of making some filled cupcakes in theme colors of orange, white, and green {we'll see how that goes}.

SP wanted to take a little treat to his teacher and helpers... so last minute (literally) we threw these together.
To get into the spirit we made RAINBOW CAKE BALLS the other day. 


I also helped lil man make a St Patty's paper wreath with my left over materials from the bulletin boards I did on campus last week.  


Well its off to get lil man ready for school now... Have a great day and HAPPY ST. PATRICK'S DAY!


Traditional Gaelic Blessing

May the road rise up to meet you.
May the wind be always at your back.
May the sun shine warm upon your face;
the rains fall soft upon your fields and until we meet again,
may God hold you in the palm of His hand.

Monday, March 14, 2011

Evolution of A Rose

Last semester I woke up my DRAWING love, after a year or so of SLUMBER, with a drawing class on campus. I was so excited to get new materials and new ideas to work with. Sadly, this semester I had to drop my painting class because it conflicted with my education classes on Mondays {and would have given me NO extra time on Mondays}.


Well lately I have been playing around, sketching, and decided to draw some FLOWERS {because SPRING is on my mind}.

So late Friday night {when I couldn't sleep} I stayed up for almost 2 hours and began MY ROSE... I finished her up on Saturday morning.


So, what do you think?

I love drawing nature {like my husband said, it's more forgiving} but also I LOVE that it just flows freely.

Yesterday I started my sunflower... I'll have to share that another day, as well as some of my other pieces.

Now I just need to keep my eyes open to some NATURAL goodies outside to bring in and set up for a next piece that I have in mind. :D

Have a GREAT week!


I'm LINKED up with the following... {please check out these great linkys}


Saturday, March 12, 2011

Spring Up Your Tastebuds with Grapefruit Zabaglione

Even though WINTER is still fighting to be heard where I live, I can't help but to dream of SPRING and all the delicious warmth that comes with it. So I decided to dig out an older recipe that always has me thinking WARM tangy thoughts...


{a light, sweet Italian caudle}


I usually make it to serve over FRESH mixed berries, but the local produce section was lacking {so I used fresh blueberries and frozen strawberries, raspberries, and blackberries}.

This is a very simple and quick recipe that you can make in less than TEN minutes and is great for a breakfast, brunch, or a light dessert {We just happened to have it for breakfast this morning}.


GRAPEFUIT ZABAGLIONE W/ MIXED BERRIES


Ingredients:
  • 3 cups mix of strawberries, blueberries, raspberries, & blackberries
  • {fresh is best, but you can use frozen defrosted}
  • 4 egg yolks
  • 1/3 cup sugar
  • 1/4 cup fresh grapefruit juice{1/2 a grapefruit will do it}
  • Pinch of kosher salt
  • Grated grapefruit zest
 

Directions:
  • In a large bowl, toss the berries together.
  • Spoon the berries into 4-6 serving bowls and set aside.
  • Combine egg yolks, sugar, grapefruit juice, & salt in metal bowl. {I used a 2 quart metal mixing bowl}
  • Whisk until color is a pale yellow.
  • Set the bowl on top of a saucepan of simmering water (do NOT let the bottom of the bowl touch the water!)
  • Using an electric hand mixer, mix 4-5 minutes until the mix has tripled in volume & is very thick and creamy.  {you could do it yourself, but its a lot of mixing}
  • Spoon the warm zabaglione over the berries.
  • Top with grated grapefruit zest.
  • Serve immediately.

{Enjoy!}


Friday, March 11, 2011

All This talk of GREEN...

No, I'm NOT talking about the green planet talk, I am talking about St. Patrick's Day {well Ireland mostly}!

So I have never traveled outside of the UNITED STATES OF AMERICA. True, I have traveled the states, but never been elsewhere. So my hubbs and I were sitting there talking the other night and he was going on an on about his trip to Germany. So I asked him to talk more about the other countries he had been to {even though I know, I just like to hear the stories}. While I know his time in the ARMY helped in making many of those travels a possibility, I still feel sort of left out {I don't know how else to explain it}.

So I was asked the top 3 countries I'd like to visit and well, here they are: Italy, Germany, and Ireland {all 3 are part of my family's background- I'm a mixed pup}.

So GREEN... Where does that fit in?

Oh wow, as I was looking up pictures of Ireland I was just wrapped up in the green of it all! That tops my list, the VAST green of Ireland. Maybe ONE DAY I will have some traveling tales from overseas to share. Till then I have my husband's tales, the Internet, and pics I gather.
All this TALK has me seeing GREEN.


Starting this weekend, I am gonna have at some ST. PATRICK'S DAY inspired yummys and crafts.
STAY TUNED...


Wednesday, March 9, 2011

Mold Your Own Crayons - Tutorial

So yesterday, as I was visiting some links I found on THE TRENDY TREEHOUSE's Creative Share Wednesdays, I stumbled across a tutorial off of Stephanie's Scrapping Station titled YOU COLOR MY WORLD {you should check Stephanie's blog out}.

Anyways, as I was reading it {and admiring how simple it is} I thought I'd give it a TRY and see what happens...

Materials
Crayons (peeled, broken up, and separated by color)
Rubber Baking Mold(s) {I used hearts, b/c that is the only rubber mold I had in the house}
Toothpicks
Peeler {like the ones you use to peel carrots}
Oven

Step 1
Peel crayons, break up, separate by colors, and into rubber molds.
Set oven to 325.
Place rubber mold on a cookie sheet.
Put in oven for 10 minutes.


Step 2
{for swirl crayons, if no- bake until melted and go to step 3}
Remove from oven.
Add a second color to the molds.
Use a toothpick to swirl.
Use a peeler to give a speckled look.
Bake until melted.


Step 3
Remove from oven.
Place in refrigerator {be very careful, it is hot and mold is wobbly}.
When cooled the crayons easily remove from the rubber mold {that's why I like them so much}.

All done!


Lil man LOVES these!

Plus, we have a few BIRTHDAY parties to go to this month... I may make small side GIFTS to go with the toys we bought the boys {though I need to get a different shaped mold- lol}.


{Enjoy!}


I'm LINKED up with the following
{you should check them out}


Tuesday, March 8, 2011

Mardi Gras Inspired Cupcakes

While we have never CELEBRATED Mardi Gras {I don't know much about it, it's just not something I grew up around}, I did want to make something FESTIVE. I love the colors; mainly the green, gold, and purple. So I pulled out some BAKING stuff and decided that since lil man LOVES CUPCAKES that I would make him some {it ashame he fell asleep so early, guess he'll have to be surprised in the morning instead}.


I wanted to do something QUICK, so I went in my pantry and saw that I had a box of Valentine's Funfetti CAKE MIX in there {hey, I can work with that}. I just followed the directions for it, divided it in three parts {unevenly I might add} and COLORED each part {green, purple, and yellow}. Then I layered them in a cupcake liner and baked according to the directions on the box {you could do this with your own favorite mix homeade or boxed}.
 
While the CUPCAKES were in the oven BAKING I went on to make the BUTTER CREAM frosting {the recipe follows}. I doubled the frosting from my recipe and then divided it into 2 equal parts {unlike my unequal batter} and colored one half PURPLE and the other half GREEN.

After cooling the cupcakes on my wire rack, I bagged my frosting {using my WILTON disposable bags} and piped it out using two different tips {still needs work}. Then I threw on some green SUGAR crystals and brown sugar cane CRYSTALS {for the gold}.
YUMMY!

{and you could see the pretty colors when you bit into the cupcake}


BUTTERCREAM FROSTING

Ingredients:
  • 2 cups confectioners sugar (powdered sugar), sifted
  • 1 tsp pure vanilla extract
  • 2 tbsp milk, light cream, or whipping cream {I used whipping cream}
  • Food coloring or gels

Directions:
  • Using a mixer (hand or counter), cream the butter until smooth.
  • Add the vanilla extract.
  • On low speed, gradually beat in the sugar
    (scraping the sides).
  • Add the milk (or cream) and beat on high speed until fluffy
    (3-5 minutes).
  • Add more milk or sugar as needed
    {I added more cream to mine}
     
  • Now you can add the coloring to your frosting,
    bag it, and you're ready to go!

*REMEMBER, I doubled mine
{so if you like frosting like me, double up}.


{Enjoy!}   


Parties I'm LINKED up to {you should check them out}